Virtual
Network Computing (VNC) is a
graphical desktop sharing system that
uses the Remote Frame Buffer protocol (RFB)to remotely control another computer. It transmits the keyboard and mouse events from one computer to another, relaying
the graphical screen updates
back in the other direction, over a network. (source:https://en.wikipedia.org/wiki/Virtual_Network_Computing)
The steps to
setup a VNC connection to Raspberrypi from a laptop running linux mint are
described here
1) Install VNC server on Raspberrypi for remote desktop connection
================================================
sudo apt-get update
sudo apt-get install tightvncserver
vncserver :1 ##launch vnc
server on pi
You will have to set the password for the connection.
In case you forget the password use sudo vncpasswd to change vnc password. :)
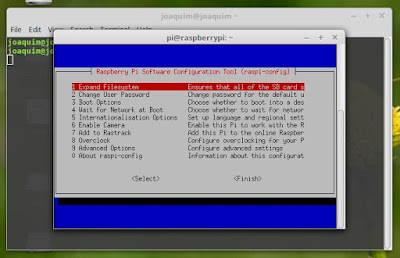
Now lets configure pi a bit -
sudo raspi-config
Go to Advanced options >VNC >enable ## enable
VNC server
2) Find out Raspberrypi's IP
=====================================
Open a terminal in pi and type
hostname -I ## This is a much simpler way to obtain the pi's ip
ifconfig
## or else use ifconfig to get pi's IP (etho> inet addr) for example
169.254.1.193
## Please note down the ip of the pi for example 169.254.1.193
3) Install vnc viewer on the laptop/PC
=====================================
sudo apt-get install xtightvncviewer
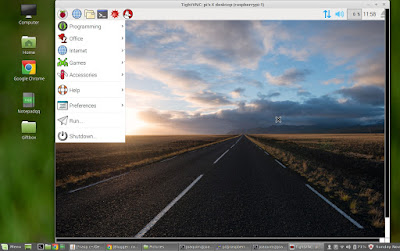
4) Connect to pi using VNC viewer
==========================
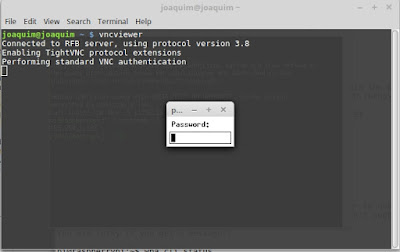
Launch another terminal on the laptop/pc
vncviewer
enter ip of the raspberry pi optained from step 2
169.254.1.193:1 ( ip:1)
enter password: your password
5) Launch VNC server on Raspberrypi boot
===================================
To configure for VNC server auto start as a service when the Pi
boots up:
Open any text editor in pi (nano/vi) to create a file to auto
start Tight VNC Server
sudo nano /etc/init.d/tightvncserver
Type in the following in the file :
#!/bin/bash
### BEGIN INIT INFO
# Provides: tightvncserver
# Required-Start: $syslog
# Required-Stop: $syslog
# Default-Start: 2 3 4 5
# Default-Stop: 0 1 6
# Short-Description: vnc server
# Description:
#
### END INIT INFO
#!/bin/sh
# /etc/init.d/tightvncserver
# Set the VNCUSER variable to the name of the user to start
tightvncserver under
VNCUSER='pi'
case "$1" in
start)
su $VNCUSER -c '/usr/bin/tightvncserver :1'
echo "Starting TightVNC server for
$VNCUSER"
;;
stop)
pkill Xtightvnc
echo "Tightvncserver stopped"
;;
*)
echo "Usage: /etc/init.d/tightvncserver
{start|stop}"
exit 1
;;
esac
exit 0
Press Ctrl+x, then Y to save the file
Edit the permissions of this file to make it executable and active
sudo chmod 755 /etc/init.d/tightvncserver
sudo update-rc.d tightvncserver defaults
sudo reboot
That's it you are done :)


No comments:
Post a Comment